env0 is a SaaS that can deploy Terraform plans, track their cost, and automatically shut them down after a given time. I’m going to show how to use it to deploy short-lived Kubernetes clusters and make sure that they get shut down when we don’t use them anymore.
Wait but why
As you may or may not know, my main source of income is the delivery of Docker and Kubernetes training. When I prepare, test, or update my materials, I need to spin up Kubernetes clusters. Often, I can use a local cluster. In fact, I often use (simultaneously) k3d, kind, and minikube; especially since these tools are now able to provision multiple clusters, and clusters with multiple nodes (not just a one-node “toy” cluster).
I currently have the following contexts in my ~/.kube/config file:
[jp@hex ~]$ kubectl config get-contexts
CURRENT   NAME             CLUSTER          AUTHINFO            NAMESPACE
          aws              kubernetes       aws                 helmcoins
          k3d-awesome      k3d-awesome      admin@k3d-awesome   default
          k3d-hello        k3d-hello        admin@k3d-hello     blue
          k3d-yeehaw       k3d-yeehaw       admin@k3d-yeehaw    kube-system
*         kind-kind        kind-kind        kind-kind           default
          kind-superkind   kind-superkind   kind-superkind      green
          minikube         minikube         minikube
But sometimes, I need a “real” cluster. It could be because:
- I need to make it available to someone else
- I need to expose pods with a
Serviceof typeLoadBalancer - I need to obtain TLS certificates with Let’s Encrypt (typically to run a Docker registry with e.g. Harbor or GitLab; Docker registries need TLS certificates!)
- I need
Persistent Volumesthat are not node-local - I need more resources (e.g. demonstrate a multi-node ElasticSearch cluster using Elastic’s ECK operator)
… As you can see, there is no shortage of reason (or excuse) to run a “real” cluster. (I say “real” with quotes, because the clusters that I run locally are just as real; but they aren’t reachable from outside my LAN and they have less resources.)
I have a bunch of scripts to spin up Kubernetes clusters. They’re designed specifically to provision a large number of clusters for a workshop or training. (I’ve used them to provision hundreds of clusters, for instance the morning just before a conference workshop. Back when conferences were still a thing, remember? Anyway.)
I often use these scripts to give myself one or a handful of clusters to run a bunch of tests. But I have to be careful to remember to shut down these clusters, otherwise they add up to my cloud bill.
That’s where env0 comes in: it gives me a way to provision resources (Kubernetes clusters or anything else, really) and give them a specific lifetime. A few hours, a few days, whatever suits my needs.
It can even start and stop environments following a specific schedule. For instance, every morning at 9am, spin up my development cluster; and shut it down at 5pm. (Talk about enforcing work-life balance!😅)
I assume that many of my readers are tinkerers like me who can easily do something similar with e.g. a script triggered by a crontab, or maybe leveraging a service like GitHub Actions. But env0 has a lot of extra features that make it interesting even for the members of the I-can-do-this-with-a-tiny-shell-script club:
- it can track the individual cost of each environment that we deploy (on AWS, Azure, and GCP)
- it gives us a nice web frontend to see what’s running (rather than sieving through the console of our cloud provider)
- it gives us a way to define “templates” and then make them self-service for others to use
- it’s using Terraform and will take care of saving Terraform state (if you’ve been using Terraform before, you probably see what I mean; otherwise, I’ll explain in a bit!)
Before showing you a demo, I’ll talk a bit about Terraform. If you’re familiar with Terraform, feel free to skip to the next part.
Terraform
Terraform is one of the many outstanding Open Source projects created by HashiCorp. (They also make Consul, Nomad, Vagrant, Vault; just to name a few.)
Terraform is one way to do Infrastructure as code. (I think it’s the most common way; and I would argue that it’s also the best one, but that’s a purely personal opinion!)
In practical terms, this means that we can describe our infrastructure in configuration files, and then use Terraform to create/update/destroy that infrastructure. It is declarative and implements a reconciliation loop, which means that we can:
- write configuration files describing our infrastructure
- run Terraform to create all the things
- make changes to the files
- run Terraform again: it will create/update/destroy things accordingly
- rinse and repeat as many times as we want
Of course, this only works with infrastructure that you can drive with an API. Cloud stuff usually works. Physical machines usually don’t. (Except if you’re using things like IPMI, PXE servers, and an API in front of all that; but I digress.)
Since our infrastructure is defined in configuration files (Terraform uses HCL, by the way), these files can be under version control, for instance in a git repository. Which means that we can use mechanisms like pull requests and code reviews to make changes to the infrastructure. Again, in concrete terms, this means that if I want to add a virtual machine or scale up a cluster, I will:
- make changes to the configuration files
- commit these changes to git
- make a pull request to our central repo
- ask a coworker to review that pull request and merge it (or perhaps do that part myself if I feel confident enough in my changes, and my team’s or organization’s policy allows it)
- trigger Terraform (or just watch, if it’s triggered automatically) to apply my changes
This lets us keep track of which changes were made, when, why, by whom. It also makes it easy to roll back changes. It can also help to bring up copies of the whole stack; e.g. “we need to replicate all these VMs, load balancers, and assorted services, to run a bunch of tests, staging, or whatever”.
Terraform does not, however, provide a cloud-agnostic abstraction. This was one of my early misconceptions about the product, by the way: I thought that I could define a stack to run on AWS, and easily move it to Azure. Terraform does not do that. When you define resources, you define e.g. EC2 instances, or Google Cloud instances, or OpenStack instances. Converting from one to another can take a significant amount of work. There are abstractions; e.g. once you have a bunch of VMs, you can have a common thing that will SSH into them and configure them; but the part that will bring up the VMs will be different for each cloud provider.
Terraform also requires that you carefully keep a state file,
typically named terraform.state. You have one such file for
each stack that you deploy and maintain with Terraform.
If you are the only person working on your resources, you can
just keep that file locally and you’ll be fine. But if multiple people
work on a given stack, you need to keep that file in a central place.
It could be on an S3 bucket or in a special-purpose VM or container.
It’s also important to make sure that only one person at a time
(or rather, one execution of Terraform at a time) accesses that
file at any given time. It is recommended to have some locking
mechanism in place. Terraform supports various state locking
mechanisms. HashiCorp also offers Terraform Cloud to manage
all that stuff and put a nice web interface in front of it - for a fee, of
course.
Before we dive into env0, a little bit of Terraform-related vocabulary:
- a Terraform configuration has inputs called variables (a well-designed plan will try to put all the configurable and tweakable values in these variables)
- a Terraform configuration can also have outputs (outputs are values generated by the plan and the infrastructure that we use, like the IP address or DNS entry for an app’s load balancer)
- a Terraform configuration is made of modules
- each module is a bunch of configuration files (usually with a
.tfextension) terraform applyis the command that will synchronize the infrastructure’s state with the Terraform configuration (it is used for the initial plan execution, and subsequent modifications)terraform planwill build a plan, or a kind of diff, if you will, between the Terraform configuration and the infrastructure state; it will show what would exactly happen if we were to executeterraform apply(i.e. “do you want to create/delete/change this?”)
Now, since I want to deploy Kubernetes clusters with Terraform, I need to find a suitable Terraform configuration.
Since I’m only an intermediate-level Terraform user, instead of writing my own Terraform configuration, I shopped around, and I found a few templates:
- an EKS example in a repo maintained by HashiCorp
- an EKS example in a repo maintained by AWS
- an AKS example in the Azure docs
For simplicity, I decided to stick to managed Kubernetes clusters. This means that you don’t need a lot of Kubernetes-specific or cloud-specific knowledge to follow along. But if you want to get fancy, you can use a powerful Kubernetes distribution like Lokomotive or Typhoon and customize your cluster deployment to your liking.
Alright, let’s see how to use Terraform and env0 together to deploy some Kubernetes clusters!
env0 in action
If you have an AWS account, I encourage you to try it out for yourself. Here are some turn-by-turn instructions if you want to do exactly what I did, i.e. spin up some Kubernetes clusters!
Note: I added a few screenshots to show what the interface looks like. And if you prefer something less static, good news, I also recorded a video to show what it’s like! It’s one of my first videos, so feel free to let me know what you think :)
Step 1: create an env0 account. (You don’t need a credit card.)
Step 2: once you’re logged in, you must create an organization, so that you can create your own templates. (You can’t create templates in the demo organization.)
Step 3: configure policies. This is not strictly necessary, but this is (in my opinion) one of the very interesting features of env0, so I wanted to make sure that we’d have a look! If we click on “settings” (just above the organization name) and then on the “policies” tab, we will see the Maximum Environment TTL and the Default Environment TTL. This are the delays after which our environments get automatically destroyed. (Note that you can always change that later, after you deploy an environment. So don’t worry about “oops my environment is going to self-destruct and I can’t do anything about it!”, you can extend it as long as you need it.)
Step 4: configure AWS credentials.
We need to give our AWS credentials to env0, so that
it can create cloud resources on our behalf. (Well, technically,
env0 will run Terraform, and Terraform will create the resources.)
We need an AWS access key and the corresponding secret key.
If you are familiar with IAM, you know what to do! Otherwise,
you can go to your AWS security credentials, click on “Access keys”,
and “Create New Access Key”. You can use the new access key
with env0, so that you can delete it when you’re done.
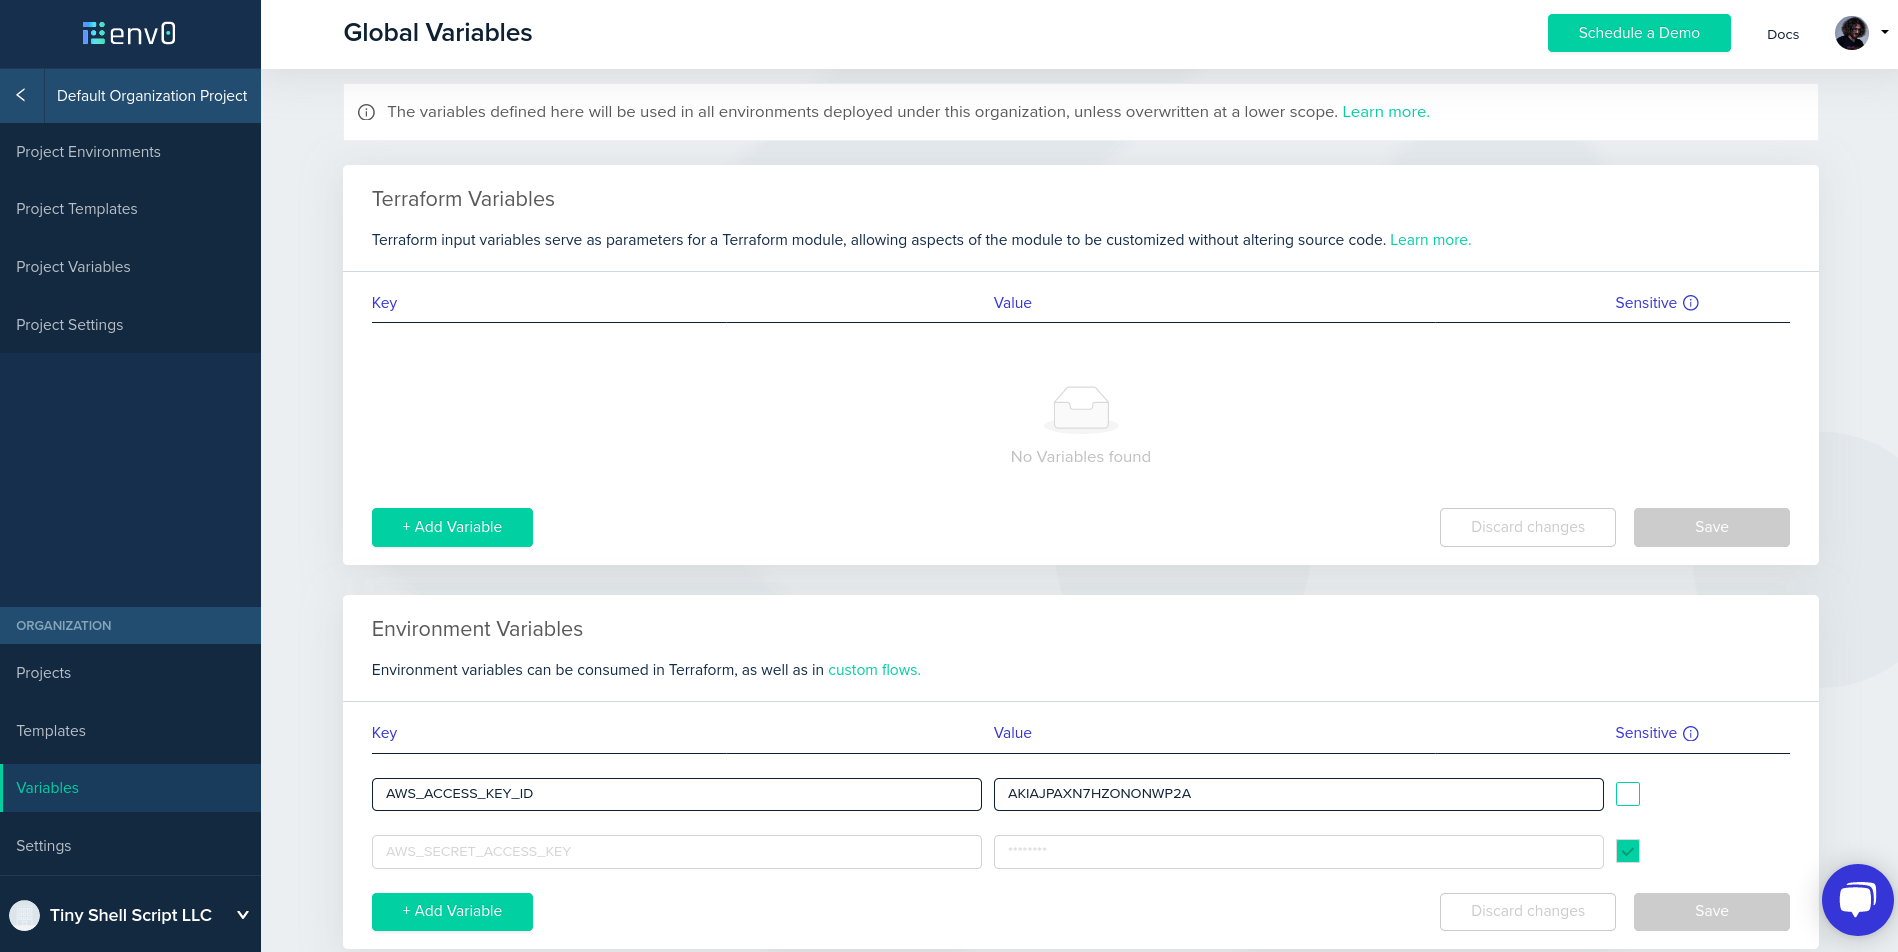
Once you have an access key, go to variables in env0, and
set AWS_ACCESS_KEY_ID and AWS_SECRET_ACCESS_KEY.
Make sure to tick the “sensitive” checkbox for the secret key.
It will make sure that env0 doesn’t show (or expose in any way)
that variable.
Step 5: create a template. Pick templates in the left column, then create a template.
- in HTTP/S repository, enter https://github.com/terraform-providers/terraform-provider-aws
- in Path, enter examples/eks-getting-started
- enter a template name of your choice
- save your template
Step 6: enable the template. This part is not super intuitive, so here is what you need to know: by default, templates don’t show up in projects. They have to be enabled for each project. This seems like a superfluous step when you have one project and one template; but if you have dozens of projects and hundreds of templates, it makes sense to select which ones are visible and where. So, anyway! You’ll have to go to “manage templates” and enable the template.
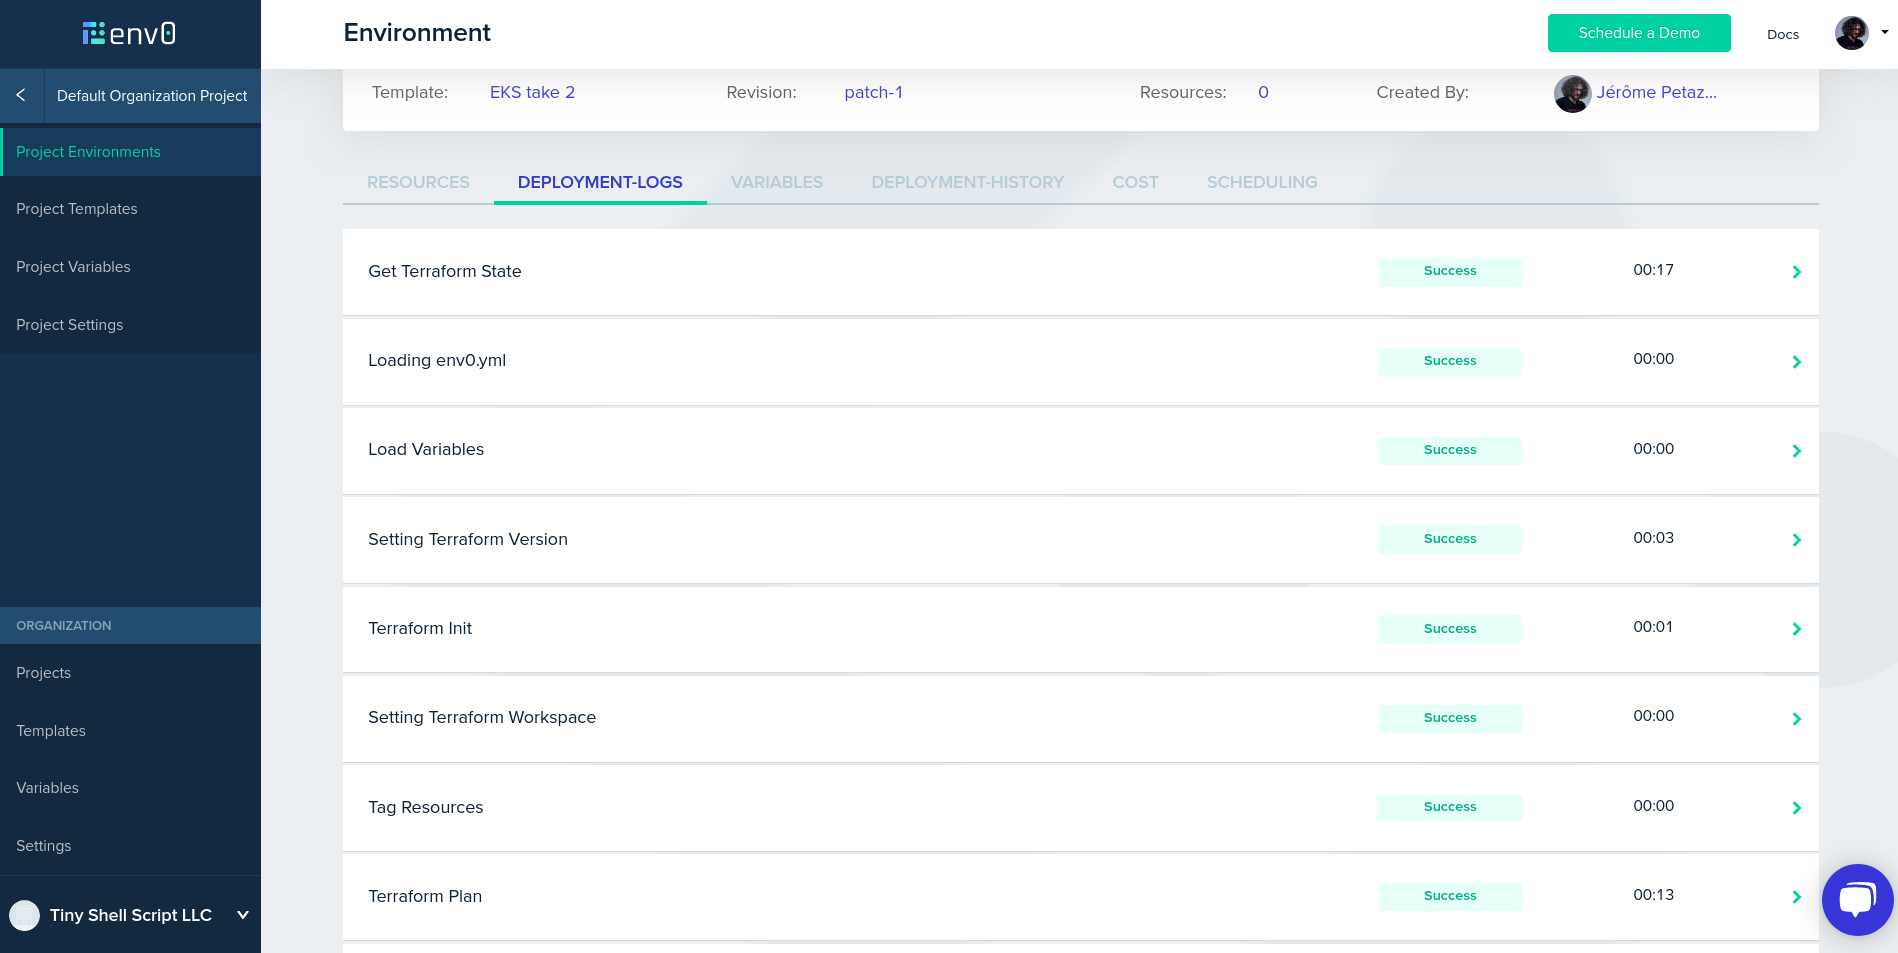
Step 7: create an environment. Alright, stuff is about to get real! In the “create environment” page, you will see the template that we just created. Select “run now”. No need to customize anything, just click “run”. If everything goes well, 10-15 minutes later your cluster will be ready. (Note that this delay is not caused by env0 or Terraform, but entirely by EKS; it’s particularly slow to provision the Kubernetes control plane.)
Generally, after provisioning resources
with Terraform, the Terraform configuration generates outputs.
The outputs could be IP addresses, passwords, or generally speaking,
any kind of information allowing us to access the resources.
In this case, the Terraform configuration generates a kubeconfig
file. We need to download that file to use it with the kubectl command line.
Step 8: retrieve kubeconfig. Click on the “resources” tab
of the environment. If the output panel is empty, just reload the
page. You should see a kubeconfig row appear. Click on it,
it will automatically copy the content of the kubeconfig file to
your clipboard. Open a new file, paste the content of the kubeconfig
file, save that under any name you like (say, kubeconfig.env0).
Note that this kubeconfig file invokes an external program,
the aws-iam-authenticator. Again, this is not something specific
to env0 or Terraform, but to EKS. If you don’t have that program,
you need to install the AWS IAM authenticator before moving on.
Step 9: profit use Kubernetes cluster. All you have to to is
to tell kubectl to use the configuration file that you created in
the previous step; for instance with kubectl --kubeconfig kubeconfig.env0
or by setting the environment variable KUBECONFIG:
export KUBECONFIG=kubeconfig.env0
Now if you kubectl get nodes you should see that you have
a brand new 1-node cluster. Yay!
jp@zagreb:~$ kubectl get nodes
NAME                                       STATUS   ROLES    AGE     VERSION
ip-10-0-0-159.us-west-2.compute.internal   Ready    <none>   8m35s   v1.16.8-eks-fd1ea7
Note that the Terraform config that we used is great because it worked out of the box; but it’s not-so-great because the name of the cluster (and of a few other resources) is hard-coded. So if you try to deploy it a second time, it won’t work. I was able to deploy another cluster by tweaking a handful of files. The right solution (generating unique resource names) is left as an exercise for the reader, as we say.
Terraform versions
I was wondering if it would be easy to deploy any Terraform configuration with env0. So I decided to try the other EKS example that I had found!
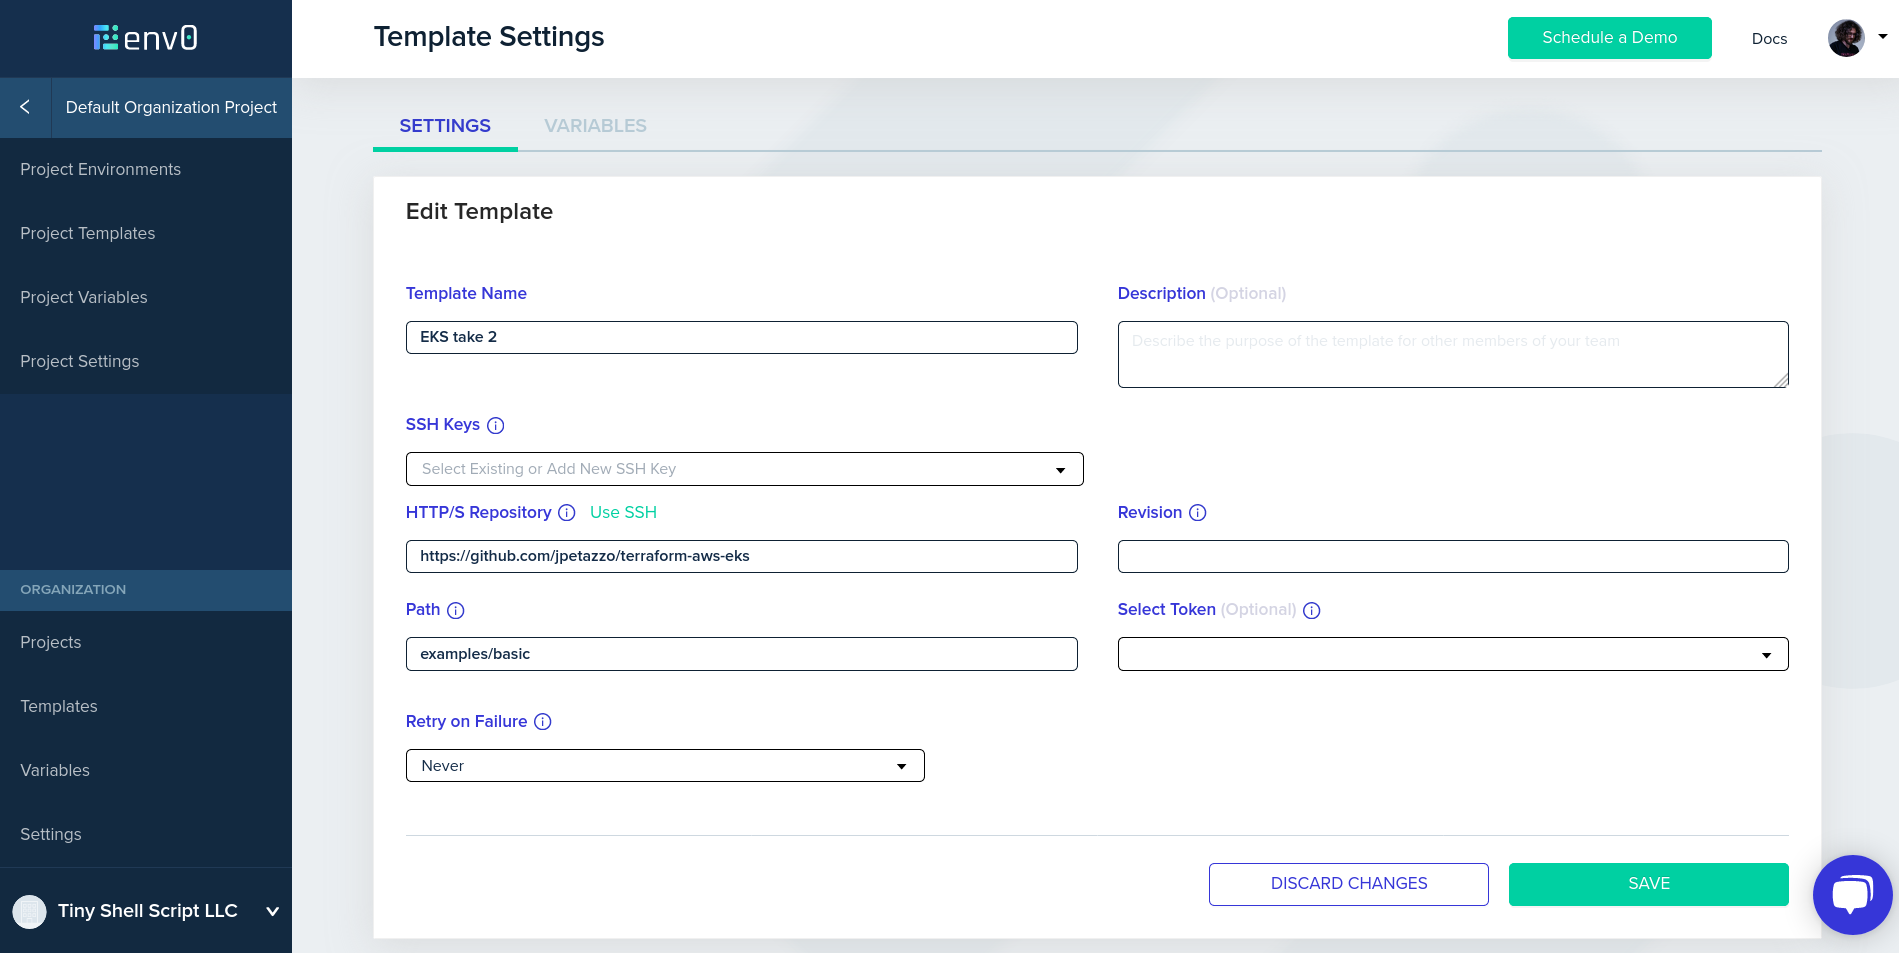
If you want to run it for yourself, it’s pretty much just like the previous walk-thru, except when creating the template. This is the information that we need to enter:
- in HTTP/S repository, enter https://github.com/terraform-aws-modules/terraform-aws-eks
- in Path, enter examples/basic
Now, if we try to deploy this configuration, env0 complains, telling us
the the Terraform version that we use is not compatible with the eks
module. What is this about? I was surprised, because I had tried this
module on my local machine before trying it with env0, and it worked fine!
It turns out that env0 uses tfenv to offer a convenient way to switch
between Terraform versions. By default, tfenv will use the lowest
Terraform version that is supposed to work with our Terraform
configuration. And in the main.tf file of our Terraform configuration,
there is a line that says required_version = ">= 0.12.0". This
causes tfenv to use version 0.12.0, even though the requirements
for the EKS module indicate that we need Terraform 0.12.9.
(Aparté: at first, this sounds like a bug in tfenv. However, if we look at it more closely, determining the lowest Terraform version for the top-level module is easy, but resolving and possibly downloading all dependencies would be much more complex, and I understand why tfenv won’t do it.)
So, how do we fix that?
The env0 docs tell us how to specify the Terraform version, either
by setting the ENV0_TF_VERSION environment variable, or by
changing the required_version directive in our Terraform configuration.
I did the latter, by:
- forking the terraform-aws-module repository,
- changing the
required_versionin my fork, - updating the env0 template to use my fork.
And after that, it should deploy like a charm. At the end of the deployment,
we get a kubectl_config output which we can copy-paste to a kubeconfig
file, just like before. Except this time we get a 3-node cluster:
jp@zagreb:~$ kubectl get nodes
NAME                                       STATUS   ROLES    AGE     VERSION
ip-10-0-2-52.us-west-2.compute.internal    Ready    <none>   3m39s   v1.16.8-eks-fd1ea7
ip-10-0-2-69.us-west-2.compute.internal    Ready    <none>   3m39s   v1.16.8-eks-fd1ea7
ip-10-0-3-252.us-west-2.compute.internal   Ready    <none>   3m36s   v1.16.8-eks-fd1ea7
(And if we look closely, we’ll notice that this is actually two node groups, with nodes of different sizes. Fancy!)
What’s next?
There are at least 3 features that are worth mentioning, but that I’m going to skip (or keep for another blog post) since this is already getting fairly long.
GitOps. When I want to update one of these environments, I can make change to my Terraform configurations, commit these changes, push these commits to a separate branch, and tell env0 to update an environment using that specific branch. And if I don’t like it, I can switch back to the original branch. This encourages a workflow where every change goes through version control, which is a pretty big deal, in my opinion. The env0 blog has a great post on that topic, showing why and how to use per-pull request environments.
Cost tracking. env0 automatically tags resources, and on some cloud providers (AWS, Azure, GCP) it can track the individual cost of each environment. This is definitely something that I want to play with, because even at my very modest scale, I often have multiple things going on in my cloud accounts, and if something gives me a way to keep track of how much each little toy experiment (or customer project) costs me, sign me up! The env0 blog also has a post on that topic, showing how to track cost over time.
API and CLI. env0 has an API, and it is relatively easy to use. I like using a web interface to get started and click around, but when automating things, nothing beats a CLI (or an API). One of my future goals is to start environments automatically with a one-liner. Meanwhile, I already hacked something together to list environments:
[jp@hex env0]$ ./env0 ls
EKS (terraform-providers jpetazzo's fork-76391       INACTIVE  2020-07-03T13:59:07.000Z
EKS (terraform-providers upstream)-31765             INACTIVE  2020-07-02T15:34:18.000Z
AWS EKS (jpetazzo's fork)-96167 (no TF VER env var)  INACTIVE  2020-07-02T14:33:40.000Z
AWS EKS (jpetazzo's fork)-32766                      INACTIVE  2020-07-02T14:32:12.000Z
AWS EKS-38020                                        INACTIVE  2020-07-02T13:37:40.000Z
And finally, you can also use custom flows, to declare hooks that should be executed at any point of the process; e.g. to execute custom scripts and actions before or after Terraform runs. Even if in theory, we can probably do everything we need within the Terraform configuration, it’s often easier to add a little shell snippet this way.
Wrapping up
env0 is a young product but it’s already very promising. In fact, I can see it being useful for many teams or organizations using Terraform, even if they don’t need the environment TTL or cost tracking features.
In the future, I will explore how to use it to provision environments for my workshops and training sessions. I wonder how it would scale to dozens or hundreds of environments, and how difficult it would be to integrate it in a self-serve workflow, for instance.
I’d also love to hear your ideas and suggestions! (After all, as I said multiple times earlier, I’m not a Terraform power-user.)
One more thing - env0’s team is very reactive and quick to address issues. During my tests, at some point, I hit a bug in the web UI that prevented me from stopping one environment. I reached out to the team. They immediately pointed me to the API (which gave me access past the web UI) and they fixed the web UI bug within a few hours. Kudos!